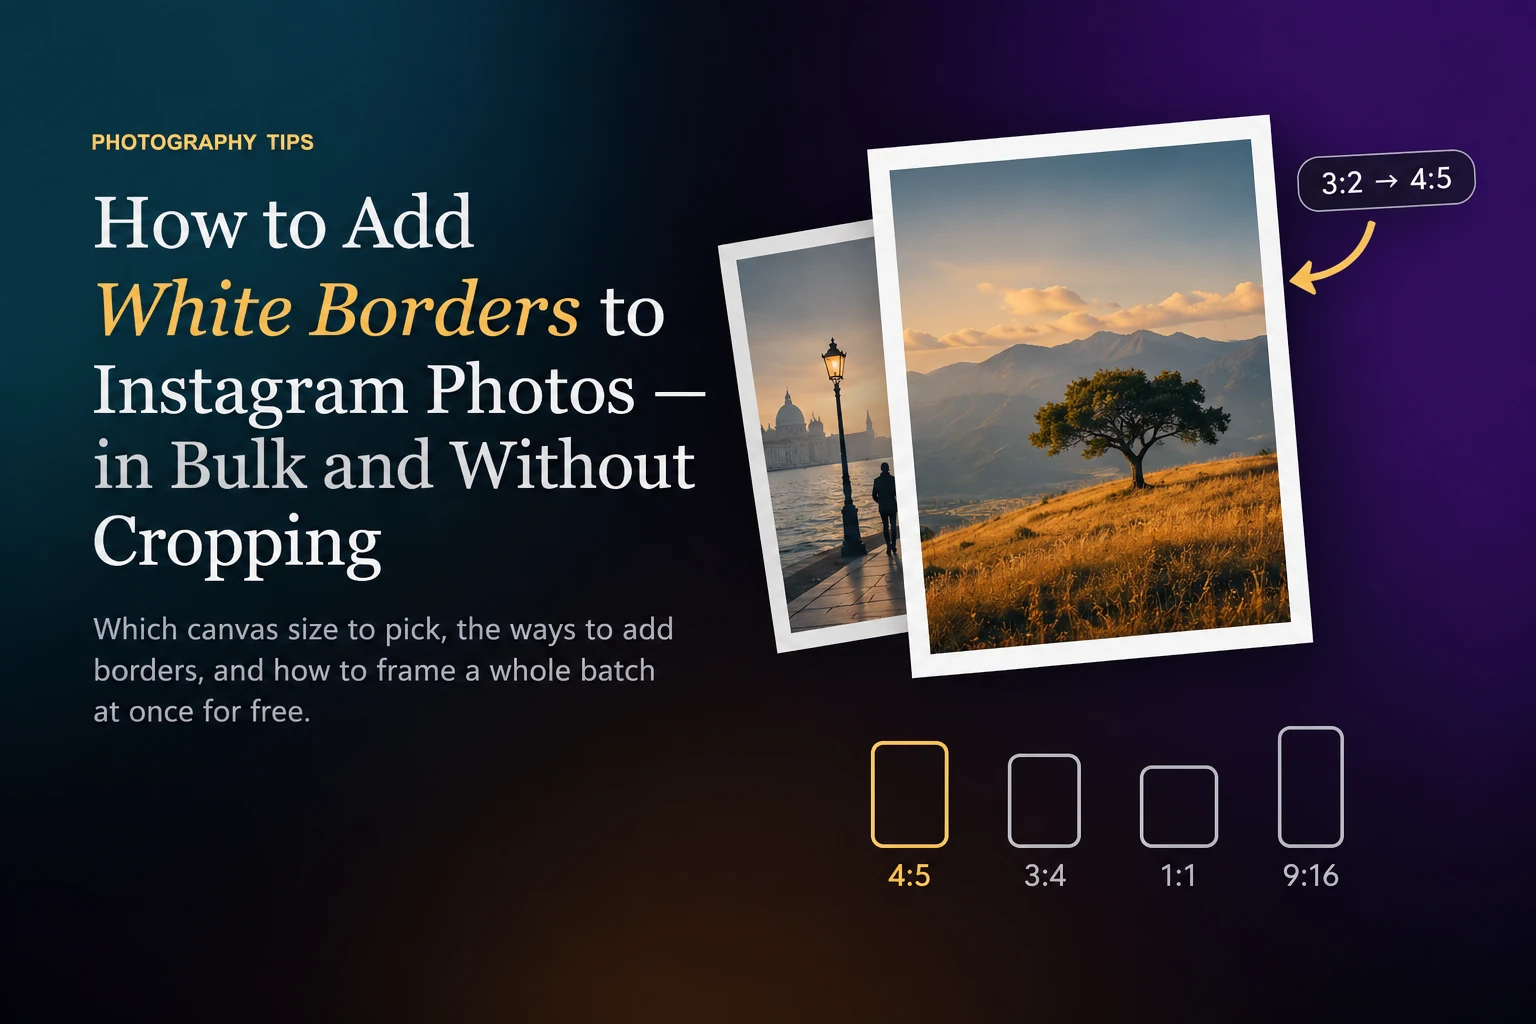
You composed a landscape in 3:2, every centimetre of it on purpose, and Instagram offers to cut off the sides. The white border is the photographers' answer: place the whole photo on a canvas of the shape Instagram likes, fill the rest with white, and nothing gets cropped. It is simple, it looks deliberate — and done one photo at a time it eats an evening. Here is how to choose the canvas and frame a whole batch in one go.
Why Photographers Add White Borders
- No cropping. The audience sees the photo as you framed it, not Instagram's guess at the important part.
- Mixed carousels stay intact. Instagram gives every slide of a carousel the shape of the first one. Put verticals and horizontals on the same canvas and none of them loses its edges.
- A consistent feed. Every post has the same shape and the same margin, which reads like a gallery wall instead of a pile of crops.
- Breathing room. The white separates the photo from the posts around it, so the eye stays on the image for a moment longer.
Pick the Right Canvas Shape
The border is defined by the canvas, not by the photo. Choose the canvas shape first and keep it for the whole post:
- 4:5 (portrait): the classic tall feed format and the safest default. It takes much more vertical space in the feed than a square or a horizontal post.
- 3:4 (vertical): the same shape as the thumbnails on your profile grid, so the grid shows the whole post, border included, instead of trimming it.
- 1:1 (square): the original Instagram format. It takes the least space in the feed but gives the most uniform, old-school grid.
- 9:16 (story): for stories, where an unframed horizontal photo looks lost in the middle of the screen.
A horizontal photo on a vertical canvas will always have more white above and below than on the sides; that is the trade-off for not cropping. What makes it look intentional is a consistent margin: the same thin border on the sides of every photo, whatever its orientation.
Ways to Add the Border
Phone apps
Apps such as White Border or Whitagram are quick for a single photo straight from the camera roll. For batches they are less generous: free versions usually cap how many photos you can frame at once, show ads or ask for a purchase to unlock batch export. Fine for one post a week, tedious for a trip.
Photoshop or Lightroom
In Photoshop you can record an action that enlarges the canvas and run it with File → Automate → Batch. It works, but the canvas you need depends on each photo's shape, so one action rarely fits both verticals and horizontals. Lightroom Classic has no border option in its export dialog; you need an export plugin such as LR/Mogrify, or the Print module's Print to JPEG workaround, one layout at a time.
A free batch tool in the browser
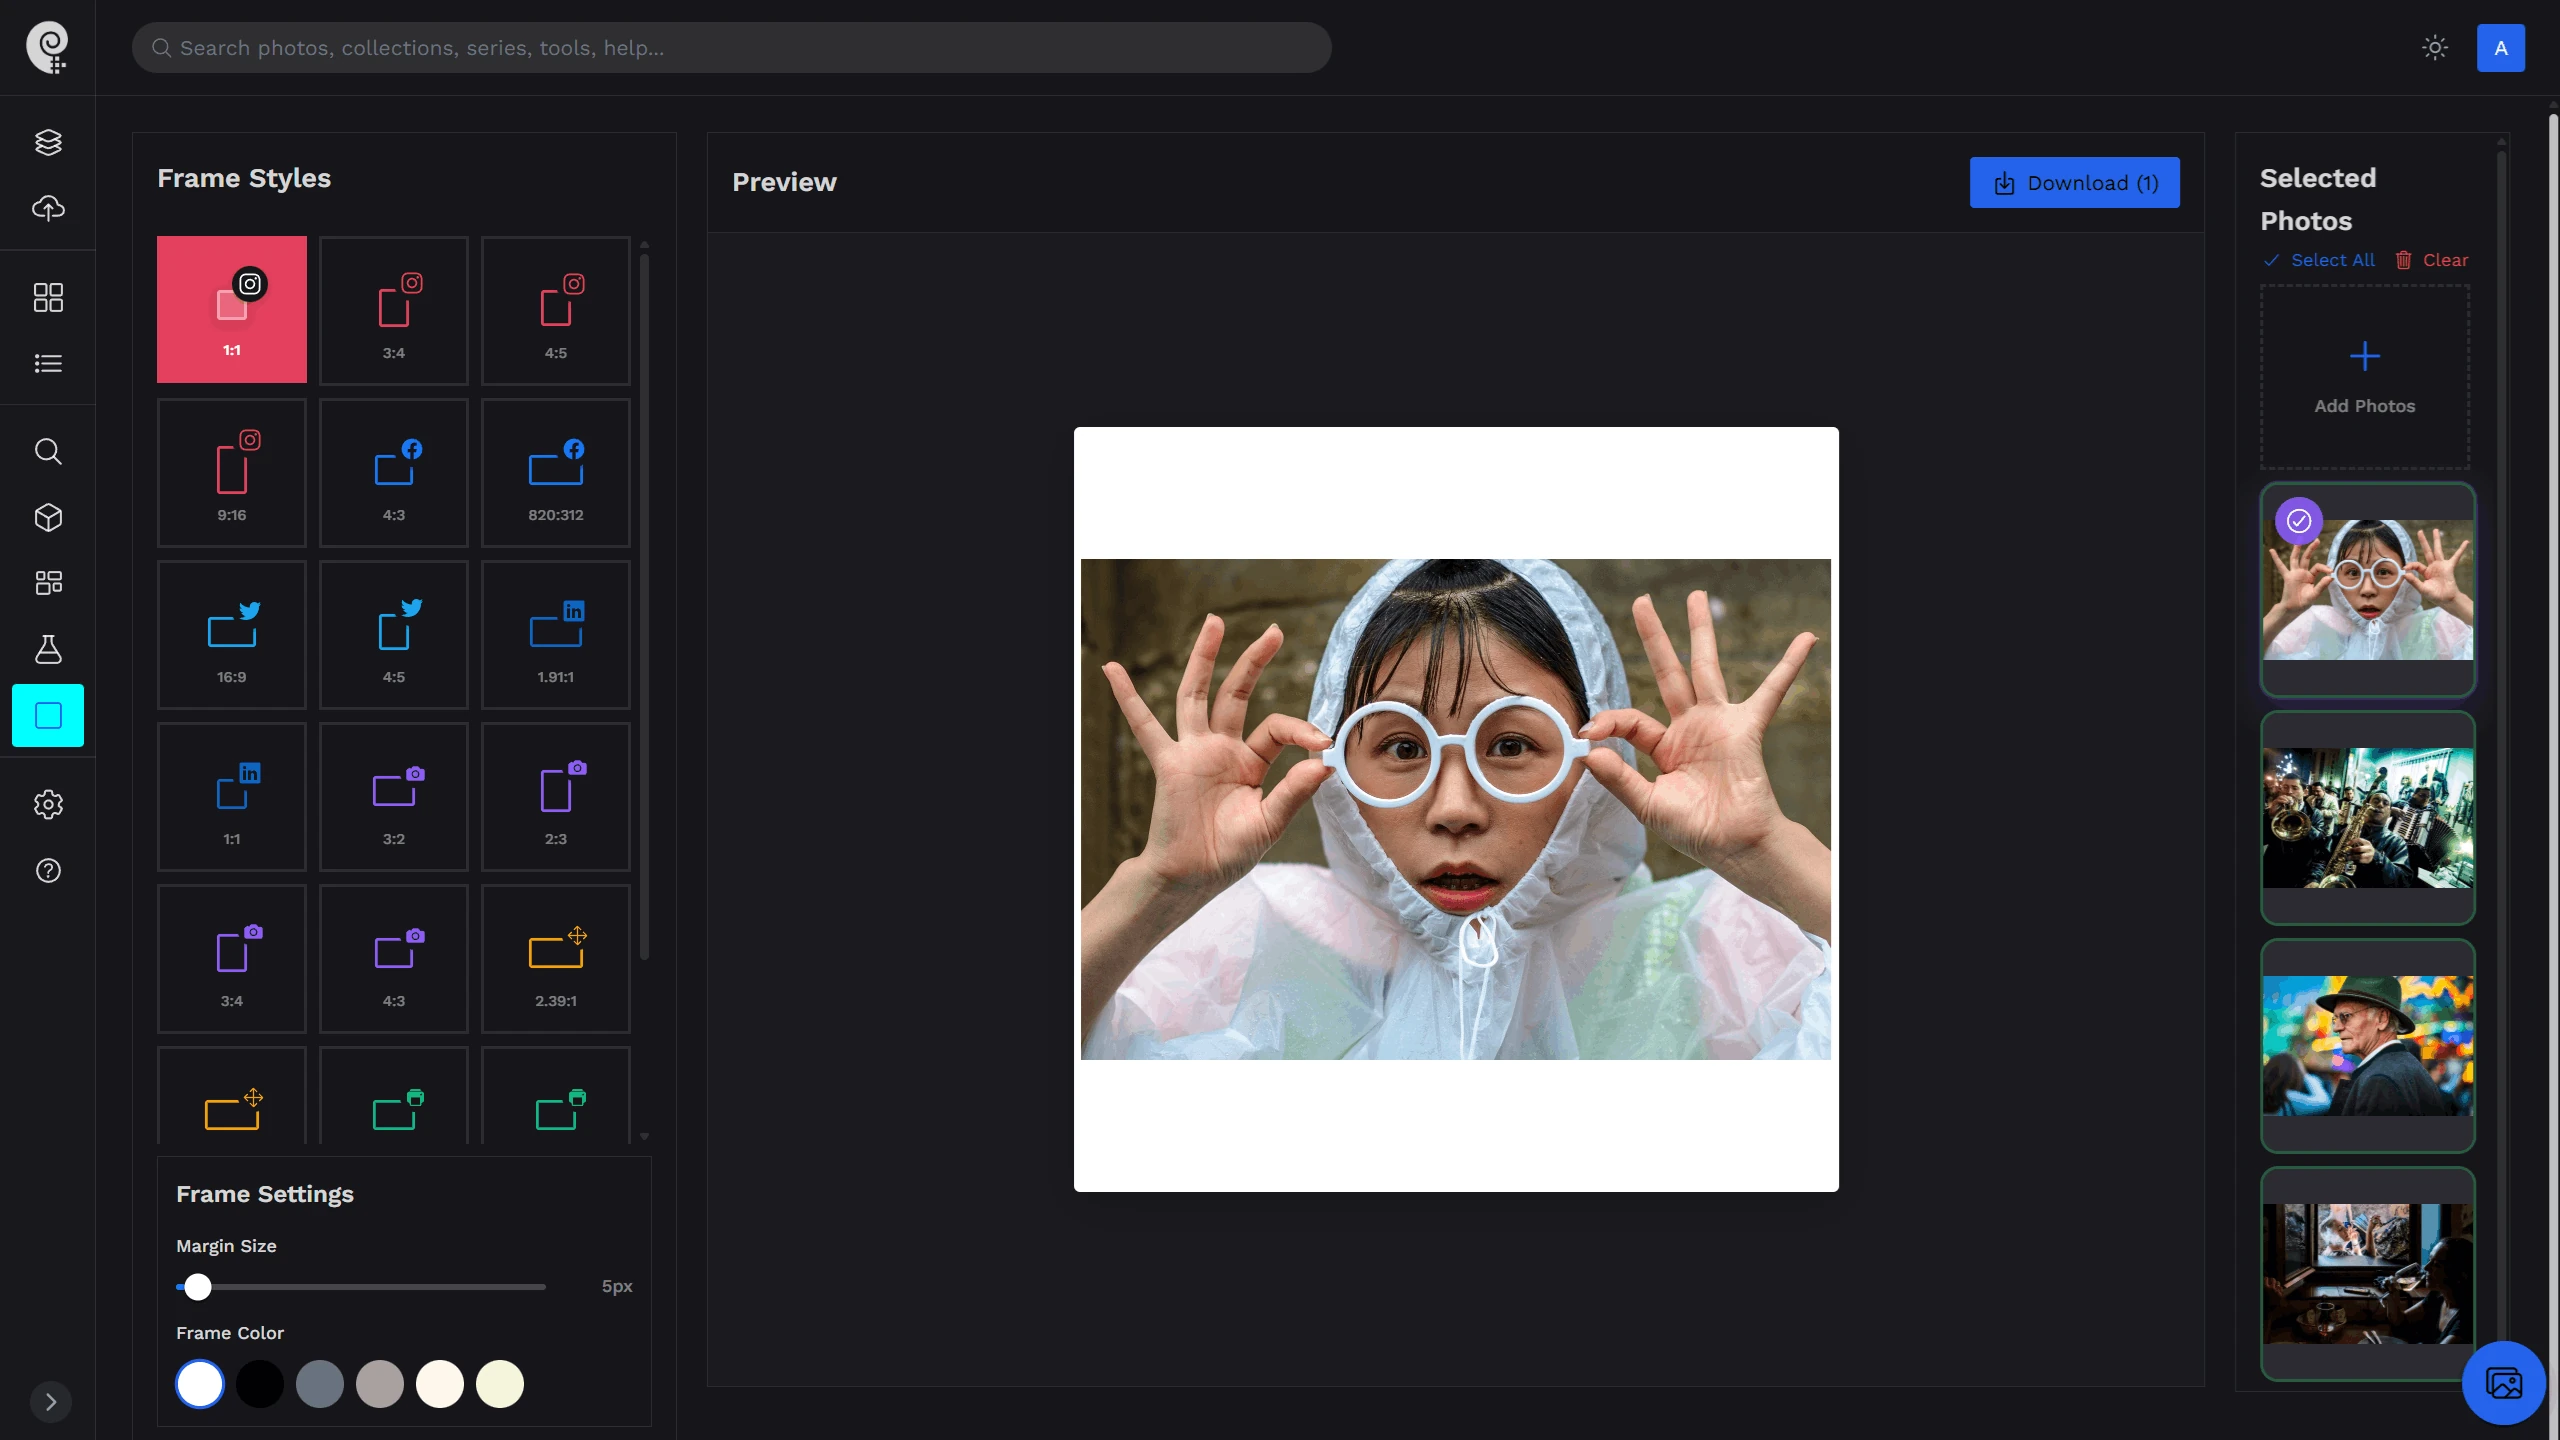
Free Framer is the tool we built for exactly this job. You drop as many photos as you like, choose a canvas — Instagram presets for 1:1, 3:4, 4:5 and 9:16, plus classic, cinema and print ratios — set the margin and the frame colour, and download everything as a ZIP. There is no account, no watermark and no batch limit, and the photos are processed in your browser instead of being uploaded to a server.
Step by Step with Free Framer
- Open Free Framer and drop the photos for the post — or a whole month of posts.
- Choose the Instagram preset: 4:5 or 3:4 for the feed, 9:16 for stories.
- Set the margin, and check one horizontal and one vertical photo in the preview before going further.
- Pick the frame colour: white for a gallery look, black for night and moody work, or grey, warm grey, cream or beige.
- Download all the framed photos as a ZIP and post them.
Before You Post: Choose the Photos
A border makes a photo look finished; it doesn't make it better. The decision that matters more is which photos earn a post, and in what order the slides of a carousel should go. Our guides on how to pick your best photos and how to sequence photos cover both. If you want a second opinion before posting, Photoreka Picks ranks your photos with an AI jury and explains each score in a short critique, and the first 10 photos are free.
Frame a whole batch
White borders for every photo, in one go
Instagram presets, any number of photos, one ZIP. Free, no account, no watermark.